Friday, December 19, 2008

Pumpkin Dip


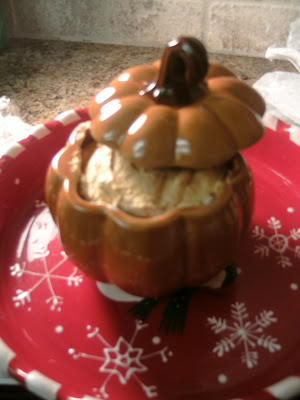
It hit me this morning as I was filling my ceramic pumpkin with pumpkiny, fluffy, goodness (for James's end-of-semester-teacher-potluck) that I have never blogged one of my most frequently used fall recipes. And fall is over!

I have taken this pumpkin dip to a lot of potlucks and here's what I've learned. Find yourself a pumpkin serving dish. Or a pumpkin plate, or put a plastic pumpkin on the plate next to the bowl. Just identify it in SOME way. Because it's orange, and I've found that people are slightly scared of unidentified orange food. So I gave in and bought this pumpkin to avoid James having to stuff an bites of this stuff into everyone's mouths at a party to force them to try it.

If they try it, they'll love it! It tastes like the good part of the pumpkin pie. I usually serve it with either cinnamon graham crackers, vanilla wafers, or my personal favorite - apple slices. Yummy yum! And it couldn't be more simple for last-minute potluck appetizers!

Pumpkin Dip
Recipe from Allrecipes
1 (16 ounce) container frozen whipped topping, thawed (Cool Whip!)
1 (5 ounce) package instant vanilla pudding mix
1 (15 ounce) can solid pack pumpkin
1 teaspoon pumpkin pie spice (I use about a tsp of cinnamon, then a pinch of cloves, nutmeg, and ginger)

In a large bowl, mix together instant vanilla pudding mix, pumpkin and pumpkin pie spice. Fold in the thawed frozen whipped topping. Chill in the refrigerator until serving.

I like to let it sit overnight, which gives time for the pudding mix to fully dissolve, otherwise it can be slightly grainy.


Monday, December 15, 2008

C is for Cookies!


Yesterday was the 2nd annual champagne & cookie swap Christmas afternoon with a group of my girlfriends and we had it at my house. My husband and coworkers were very happy about all the goodies I collected!

I love Michaels with all my heart :) I got these adorable chinese takeout containers and tied mini cookie cutters to each one for the girls to take their cookies home in!
To go with the cookies I made a couple of appetizers that taste much better than they look. (Uglyfoodblogger, are you still around? I think this may make the cut!) But they tasted so good, the girls still ate them all up! Recipes are below for BBQ pulled pork bites and pesto/sundried tomato spread.
BBQ Pulled Pork Bites
Recipe by me :) Made this one up.

1 1-2 lb pork tenderloin (or 1/2 whole pork loin, or 2lb pork butt or shoulder roast)
1 bottle of your fave bbq sauce (Sweet Baby Ray's original for me!)
1 cup water
2 packages of pillsbury crescent roll creations (the big flat sheet of crescent rolls)
2 Tbs extra virgin olive oil
1 clove garlic
1-2 cups shredded cheese

For pulled pork: (this is the recipe I use to make pulled pork for sandwiches too)
Place pork in crockpot (all in one piece).
Pour 1/2-1 cup bbq suace on top, enough to cover the top of it. Pour 1 cup of wateraround the sides of the roast.
Put the lid on and cook all day on low or 4-5 hours on high.
Take pork out, and shred with two forks (it should be pretty tender and fall apart easily).
For these appetizers, I first cut the tenderloin into 1-2 inch slices, and shredded each slice to make sure the pork shreds weren't too big for the appetizers.
Mix with another 1/2-1 cup bbq sauce until it is the consistency you want.

For appetizers:
Preheat oven to 350
Roll out crescent dough sheets onto 2 cookie sheets.
Mince 1 clove of garlic and put it in a small bowl with 2 tbs of EVOO. Microwave for 30 seconds. Brush the oil and garlic onto the crescent sheets.
Bake in the 350 degree oven for 10 minutes or until it starts to turn golden. Remove from the oven, and switch to your broiler.
Sprinkle cheese on each crescent sheet, all the way to the edges.
Place under broiler for a couple of minutes until the cheese melts (it won't take long! Keep an eye on it!)
Cut each sheet into 2" squares.
Place about 1 Tbs of hot pulled pork on each piece.
I'm thinking it would look better with some scallions or chives snipped on top.
Pesto/Sundried Tomato spread
Recipe - if you can even call this a recipe - is by me. Got the idea from a storebought spread I had at a church party.
Ingredients
2 oz of cream cheese (I buy 8 oz, cut it in half, then cut that piece in half like I'm opening a hamburger roll or something)
2 tablespoons of prepared pesto (my favorite is the refrigerated butoni brand)
3-4 chopped sundried tomatos (the ones in a jar, packed in oil)
Directions
Take the tomatos out of the jar and drain them for a few minutes on a paper towel to get rid of some of the oil.
Mince the tomatos into small pieces.
Spread cream cheese onto serving plate (I just place the little 2x3x1/2" pice that I cut from the block onto the plate).
Spread pesto on top of cream cheese.
Place tomatos on top of pesto.
Serve with crackers and a cheese knife to spread.
This is a perfect last minute appetizer, the jarred pesto and tomatos last forever unopened in the pantry. We always have some of the refrigerated stuff on hand for quick dinners.

Thursday, December 11, 2008

Merry Christmas!

Merry Christmas!

Love, Reilly and Lilah


Thursday, November 20, 2008

Thanksgiving Menu

After many drafts, I think I've finally got the menu set for Thanksgiving. This year, we are attending a lunch thanksgiving and then I'm cooking a dinner Thanksgiving! Should be a very busy day, but I'm really looking forward to it. I'll take as many pictures as I can remember to take and hopefully post more recipes this year!


Thanksgiving 2008 Dinner Menu


Appetizers
-Parmesan Pinwheels
-Deviled Eggs (Behlen tradition!)
-Veggie tray

Dinner
-Brined Oven Roasted Turkey Breast (same recipe as last year, but I'm going to attempt Spatchcocking this year! I'll try to provide pictures of the hilarity)
-Traditional Dressing
-Creamy Herb Mashed Potatos
-Sweet Potato Souffle (seriously. best. ever. sweet potatos.)
-Pioneer Woman's Fresh Corn with Wild Rice (Made a test run this weekend. Tasted good, but was....strange. Not going to risk it on TG.)
-Roasted Cauliflower and Green Beans
-Cranberry Applesauce
-Challah (Jewish Egg Bread. Judy Bread. Perfection)


Desserts
-Apple Pie
-Furr's German Chocolate Pie. (My husband would MUTINY if my Mother in Law didn't bring this. Seriously. I think he might just walk out on the whole thing. I made him one from scratch once, and it was close, but no Furr's. Sigh.)

Tuesday, November 11, 2008

Kitty time!

Okay, so it's not food related, but I just couldn't resist! Meet our new babies! The black kitten is a little girl named Lilah. The grey tabby is her brother, who James has yet to choose a name for. I'm guessing it will be some variation of Texas Tech Red Raider Graham Harrell Michael Crabtree Wes Welker.

They came to us from the Lewisville Humane Society last night. If you're looking for a rescue, I highly recommend working with HSL. They have a few extra steps in the rescue process, but they are VERY thorough and make sure that you and your new pets have the best chance of staying together forever.

They adjusted really well last night, immediately used their litter box, ate their dinner, scratched the scratching post, and snuggled in their beds. They have their own bedroom for now so they don't get into too much trouble while we're at work. Tonight we may let them explore the rest of the house!


Monday, November 10, 2008

Bruschetta Orzo Salad

I made this a few weeks ago for a dinner party. It was my first time to use orzo! I don't recommend making new recipes for dinner parties, but I was bound and determined to use the orzo in my pantry, and the flavors went well with the rest of my dinner so I went for it!

It turned out great, the flavors were good, the texture was great, and it was something different than the same old same old. I recently asked James to plant fresh basil over my grave the day I die. I would put it in EVERYTHING if he'd let me!

I'll warn you - the orzo should probably be done the day before, it took a while to cool. (I hate it when I get into a recipe the night I want to eat it and realize it's going to take days!)


Bruschetta Orzo Salad

recipe by: me! Made this one up from scratch

-1 cup of orzo
-1 cup cherry or grape tomatos
-2 large garlic cloves
-1/3 cup balsamic vinegar
-1/4 cup plus 2 Tbs olive oil
-1/3 cup fresh basil leaves
-1/4 cup chopped shallots (or onions)
-1/4 cup of crumbled feta

1. Cook and drain the orzo according to package directions. Toss with the 2 Tbs of olive oil and let it cool completely.
2. Heat up remaining 1/4 cup olive oil in a skillet over medium heat. Toss in shallots and let them cook for a couple of minutes until softened and translucent. Toss in garlic and let it soften and flavor the oils, it will only take 30 seconds to a minute. Don't brown or burn the garlic!
3. Whisk balsamic vinegar into the oil, shallots, and garlic, and let the dressing cool completely.
4. Cut tomatos in half (If using roma tomatos, remove the guts, and dice the firm flesh)
5. Mix the cooled orzo, cooled dressing, tomatos, and feta cheese, breaking up the orzo with a fork. (all the steps to this point can be done the night before. Add the basil just before serving)
6. Chiffonade the basil by rolling up the leaves and slicing with a knife. Stir the basil into the salad.
7. Top with additional feta cheese and serve cold.

Thursday, October 23, 2008

Dump Cake


I have to admit I was skeptical of my husband's proclaimed love for this "cake" when we were dating in high school. He raves about some of the strangest things, but the one he asks for every birthday is his mom's famous dump cake. And after trying it, I was hooked!

After we got married, Brenda (my mother in law) graciously shared her recipe with me, and after making it, I was even more hooked! Could there be an easier dessert out there? James and I can eat an entire 9x13 of this stuff in two days, easily. 1 if we have company.

Thank you for the recipe Brenda!

Brenda's Dump Cake
Recipe shared by Brenda Behlen

1 large can of pineapple (I used the kind in juice, but you can use the syrup one too)
1 large can of cherry pie filling
1 box yellow cake mix
1/2 bag of coconut
1 stick butter

Then we dump!

1. Dump (get it!?!) the pineapple and pie filling into a greased 9x13 pan. Mix it together.
2. Dump the dry cake mix on top
3. Dump the cocnut on top of that. (I just eyeball this part, lay it on pretty thick, we do at least an inch or so covering the cake mix)
4. Slice the butter into thin pats and lay them on top of the coconut, evenly covering as much of the cake as possible.
5. Bake in a 350 degree oven for 30-45 minutes or until the coconut starts to brown. The butter will soak down and mix into the cake mix.

This cake is great warm or cold. We usually have to fight off the urges long enough to not burn ourselves when it comes out of the oven.

Sunday, October 19, 2008

Pie Crust 101

My friend Kelly and I had a ball a few weeks of putting together an apple pie. As you can see a few posts down, we did have some mishaps, but she assures me she ended up with a great pie, and we each went home with a dish of homemade applesauce as well.

Here's Kelly :):

So here are the step by step instructions as I know them. Pioneer Woman I am not, so bear with me! 

Place 2 sticks of cold butter into 2 1/2 cups of flour.  I don't go crazy here and freeze the butter and the bowl or anything, just pull the butter straight from the fridge and drop it in. I also add a Tbs of sugar (for a sweet pie) and a tsp of salt.


Using a pastry blender (or if you're my mom and you're really good--two knives!) and cut into the butter and flour. This is "cutting the fat into the flour" that recipes call for. You'll cut one direction, than another, just keep at it, almost like a kneading motion while holind the pastry blender.


It will start to combine and look like this. We're not quite there yet!


Ahh, there they are. The small peas. When all the little butter blobs are about the size of small peas, you're there. You know all those beautiful flakes in a good pie crust? Those come from these tiny peas melting individually when it's cooked to form little buttery pockets in the crust. 


Add cold water, one tablespoon at a time (again, I don't go nuts with the temp. We don't want the butter to melt, but I don't feel the need to soak the water in ice or anything). I usually add 6-8 tablespoons total. Sometimes more, sometimes less. This will depend on humidity, the water content in butter, just the overal mood of your flour? Just don't dump it all at once. You'll be sorry. 


Mix the water in with your hands or the dough hook after each water addition. Pick up some of the dry mixture and form it into a ball with your hands. Pull it in two, if it crumbles completely, keep adding water. If it's starting to pull apart like dough, stop adding water! It should be somewhat dry, but not totally falling apart.


Form the dough into two discs and wrap them in plastic wrap (or...if you forgot to buy plastic wrap,  in the produce bags from the apples for your pie!) and put them in the fridge for at least 30 minutes. Don't skip this step!! You'll be sorry again.


When you're ready to roll it out, flour everything! The counter, the dough, the awesome rolling pin your mom bought you, anything that might touch the dough.


Roll the disc out in one direction in short little flips of the roller. You don't want to be too hard on the dough, you'll squish all those aforementioned buttery fat pockets.


Flip the dough over and turn it 90 degrees, be sure to throw a little more flour underneath it, on top of it, and on your rolling pin. Continue to roll in short little flips. 


You'll repeat this process of flipping and turning the dough, and rolling it out, several times. You don't want to just leave it flat and get it all rolled out, it will be STUCK to the counter without the flipping turning action. TRUST ME. You'll be....sorry. :)


The easiest way I've found to move the dough is to fold it into fourths (I tried to show Kelly the cool way of rolling it onto your rolling pin almost ended in disaster) and then move it to the pan. It may break some, but you can just press it back together.


With the bottom crust in the pan, repeat the process to roll out the top crust. You can either seal the of the top and bottom crust with a fork, or use your thumb between your forefinger and middle finger to flute the edges.


And voila! You've made a pie. You won't be sorry!


Cooking 101

I recently told someone that I think there should be an "in-between" cooking school that teaches basic techniques. Central Market has an awesome knife skills class, but it seems like the rest of their classes go over making a specific meal or type of cuisine. I'd love to take classes that centered around basic cooking skills - pastry making, sauce making, bread making, etc.

I'm lucky I have my mom, I can call her in a panic, or plan a Sunday afternoon in her kitchen for her to walk me through all the basics. 

Last year, after some very failed attempts, I had my mom walk me through pie crust. A few weeks ago, I passed on the lesson to a friend of mine from work. Before I share our pie crust lesson, I wanted to do an entry sharing what my mom wrote about our afternoon together last year.


RECIPE FOR FAMILY
by Faye Beaulieu


It was never about the piecrust.
Two weeks before Thanksgiving, my daughter, now married for one year to the young man who won her heart the day she turned sixteen, called me with a request.  She wanted a piecrust lesson.
Now you have to understand – this is the daughter who is not at all fazed by the prospect of working with phyllo dough.  She stuffs pork chops, grills salmon, creates fruit cup containers out of citrus rind, and bakes challah.  She has her own cooking blog, for crying out loud.  And she wanted me to teach her how to make piecrust.
I have my high school home economics teacher to thank for this moment.  I grew up in rural Mississippi.  Girls took “homemaking.” Guys took “shop.”  I made the requisite garments during the weeks devoted to sewing, but those lessons never took.  The gathered skirt and button-front blouse hung in my closet unworn.  They earned me an A in class, but I was never happy with the way they looked.  To this day, I’m grateful that I learned to hem, to sew on buttons, and to replace broken zippers.  Bolts of fabric in a cloth store and patterns that promise to turn that fabric into fabulous creations, however, hold no magic for me.
But cooking was another story.  The weeks spent in that unit flew by.  I learned to measure, to whip egg whites, to make emergency substitutions.  Time actually spent in the classroom kitchen was charmed, and I looked forward eagerly to the days when it was my turn to cook.  To this day I regularly pull out a couple of the recipes taken away from those classes; I’ve never found a way to improve on the Chocolate Sheet Cake and its partner icing.
One of the stock items taught every year to first-years was the daunting Caramel Pie.  Not only did the unseasoned cooks-in-training face learning to caramelize sugar, but they also had to figure out how to get an acceptable shell to emerge from the flour, shortening, and salt stacked on the counter. A very patient Mrs. Scott guided hairnetted newbies through the process: cutting the shortening into the flour, adding just enough cold water to make a soft dough, and rolling out the crust.  Sounds easy enough.  Veterans, however, know there’s a reason the refrigerated ReadyCrusts sell as well as they do. 
I agreed to the request for the Saturday afternoon piecrust lesson, and Carla and I jumped into the process, she eager to add another skill to her repertoire, I just happy to have something to share with her.  I showed her how to use the pastry blender to integrate flour and shortening, how to add cold water bit by bit, how to work the resulting mass into soft dough and how to coax a smooth, even product from the dough with the aid of one of my most-treasured possessions: my thirty-year-old wooden rolling pin.  
And as we worked, we talked.  About husbands, about professions, about friends, about life. We relived experiences from pages of our own family history and speculated on the future.  We shared dreams and exchanged opinions on everything from the imminent presidential race to hybrid cars. 
And as the time passed, the pie shell moved from the counter to the baking dish, and we spent a few minutes on fluting techniques and ways to control the color of the crust as it bakes. We decided on a chicken-spinach quiche to fill the shell, and we cleaned the kitchen as it baked.  She left as the sun set, her half of the quiche resting in foil on the floorboard, dinner for her and James.  
It really never was about the piecrust.  It was about a mother and daughter spending time together, reinforcing the structure on which family is built.  And about revisiting those important moments that give us hope for the days ahead.  When she opens her birthday present – a pastry blender, a collection of cookie cutters, and her own heavy wooden rolling pin – I hope the memories of our afternoon together drift up from the tissue paper as well.

I love you mom! Thanks for ALL the lessons, not just the pie crust one :)


Below is my mom, Living United!


Sunday, October 5, 2008

Yummy Mistake!

I had a friend come over today for pie crust 101 (more on that later). We set out to make a perfect apple pie so that she could master it and make one for her family's thanksgiving. We went over types of apples, precooking the filling vs cold filling, forming and rolling the crust, everything!

But then I got a little ADD while waiting for the filling to cook, and decided to go check my fantasy football. UGH. Apparently I got a little wrapped up in my "But I'm undefeeeeeated!!" whine, because by the time we went back to check the filling--we pretty much had applesauce.

So we went back to the store for more apples ($8 for 6 apples, inflation is killing my baking budget!). We started over on her pie, but I decided to add a little extra liquid and turn my mistake into applesauce. The result was a hearty, rustic (i.e. lumpy!) and very tasty applesauce!

I'd take a picture, but you know what applesauce looks like, and I don't want to make it into the ugly food blog hall of fame :)

Accidental Applesauce
by Carla

6-8 apples (various kinds, I used a mixture of Granny Smith, Golden Delicious, Honeycrisp, and Fujis)
3 tbs butter
3/4 cup sugar
1 tsp cinnamon
dash of nutmeg
dash of ginger
dash of cloves
1/2 cup of water

1. Peel, core, and slice apples into small slices
2. Melt 3 tbs of butter in a large pan big enough to hold all the apples
3. Toss the apples in the butter until all apples are covered and glossy. Cover and cook the apples over medium heat for 10-15 minutes until they start to turn soft and fall apart. (At this point, go check your fantasy football. Question Ladanian Tomlinson's manhood. Curse your husband for his tight end advice).
4. Uncover and add in water, sugar, and spices. Stir with a spatula and break up remaining apples. Continue to simmer sauce and break up apples for another 10 minutes or so until it resembles applesauce.

I liked it with some chunks of apple left in it. If you like yours smoother, the Joy of Cooking recommends putting it in a food processer or blender. 

I can't wait to use my newfound homemade applesauce to make my cranberry applesauce for thanksgiving!

Monday, September 29, 2008

Pumpkin Roll

Now that we've done apple pies, what's the next thing we MUST introduce if we are truly going to usher in fall? PUMPKIN!
Last year James told me he absolutely did not like pumpkin. I made a weight watcher's recipe for pumpkin spice muffins (literally just one box spice cake mix + 1 can of pumpkin, baked into mini muffins, 1 pt each I think). He agreed to try them because they smelled so good, and his response was "There's some really yummy taste in there I can't identify" then proceeded to eat the whole pan. Fast forward a few weeks, I made a pumpkin dip (cool whip, vanilla pudding, canned pumpkin. literally ALL you can taste is pumpkin). And his response again was "There's just some really yummy taste to this!"
Uh--babe. That yummy taste is pumpkin. You like pumpkin! He then admitted that he had never tried it, and has been a pumpkin lover ever since.

I made this pumpkin roll for company Friday night, but ended up getting sick and cancelling the company. So we ate it ourselves. Just ate the last piece for breakfast actually. Yum!

Overall, good recipe. I thought it could use a little more sweetness in the cake part, but the filling was plenty sweet so I guess as long as the ratio of each bite was right it was sweet enough. After sitting and reading the joy of cooking yesterday, I've decided I also want to try this with vanilla ice cream for the filling and freezing.


Libby's Pumpkin Roll

ALL credit goes to http://www.verybestbaking.com/ As in, I copied and pasted. Even the photo.


Ingredients:

CAKE
1/4 cup powdered sugar (to sprinkle on towel)
3/4 cup all-purpose flour
1/2 teaspoon baking powder
1/2 teaspoon baking soda
1/2 teaspoon ground cinnamon
1/2 teaspoon ground cloves
1/4 teaspoon salt
3 large eggs
1 cup granulated sugar
2/3 cup LIBBY'S® 100% Pure Pumpkin
1 cup walnuts, chopped (optional)
FILLING
1 pkg. (8 oz.) cream cheese, at room temperature
1 cup powdered sugar, sifted
6 tablespoons butter or margarine, softened
1 teaspoon vanilla extract
Powdered sugar (optional for decoration)

Directions:


FOR CAKE:

PREHEAT oven to 375° F. Grease 15 x 10-inch jelly-roll pan; line with wax paper. Grease and flour paper. Sprinkle a thin, cotton kitchen towel with powdered sugar.

COMBINE flour, baking powder, baking soda, cinnamon, cloves and salt in small bowl. Beat eggs and granulated sugar in large mixer bowl until thick. Beat in pumpkin. Stir in flour mixture. Spread evenly into prepared pan. Sprinkle with nuts.

BAKE for 13 to 15 minutes or until top of cake springs back when touched. (If using a dark-colored pan, begin checking for doneness at 11 minutes.) Immediately loosen and turn cake onto prepared towel. Carefully peel off paper. Roll up cake and towel together, starting with narrow end. Cool on wire rack.


FOR FILLING:

BEAT cream cheese, 1 cup powdered sugar, butter and vanilla extract in small mixer bowl until smooth. Carefully unroll cake. Spread cream cheese mixture over cake. Reroll cake. Wrap in plastic wrap and refrigerate at least one hour. Sprinkle with powdered sugar before serving, if desired.


COOKING TIP:Be sure to put enough powdered sugar on the towel when rolling up the cake so it will not stick.

Monday, September 22, 2008

Apple Hand Pies

Happy 1st day of Fall!


I've been craving pie, but every time I make a pie we throw half of it away. Solution - super cute little hand pies!


I mixed a few regular Apple pie recipes to get to this one, thanks to Martha Stewart and the Joy of Cooking! :)


I took the picture on my phone because I left my camera somewhere this weekend, so sorry for the crappy quality!

Apple Hand Pies
Makes 8


Crust:
2 sticks (1/2 lb) of butter, chilled
2 1/2 cups all purpose flour
1 tsp salt
1 Tbs sugar
6+ Tbs water


1. Using two forks or a dough hook (or a food processer, on my Christmas list!) cut the butter into the dry ingredients until it resembled small peas.
2. Add water, 1 Tbs at a time, and mix until the mixture begins to form a dough. It's ready when you can ball up the dough and it sticks together without crumbling, but it shouldn't be wet or sticky. Add water sparingly!
3. Form the dough into two flat discs, wrap with plastic, and refrigerate for at least 30 minutes while you prep your filling.


Filling
4-5 large apples (I use the Alton Brown apple pie mixture - honeycrisp, granny smith, golden delicious, and braeburn)
3 Tbs butter
1 cup sugar
cinnamon, ginger, nutmeg
1 egg


1. Peel, core, and coursely chop apples into 1/2 inch cubes.
2. Melt 3 Tbs butter in a large skillet or saucepan big enough to hold all your apples.
3. Stir apples into melted butter until coated, cover, and cook on medium heat for 5-10 minutes until apples are soft on the outside but still have some crunch.
4. Mix 1 cup of sugar with cinnamon, ginger,and nutmeg to taste. I like a pretty healthy pouring of cinnamon (2 tsp maybe?) and just a small pinch of the ginger and nutmeg.
5. RESERVE 1/4 cup of the spiced sugar mixture.
6. When apples are parcooked, add remaining 3/4 cup of the sugar mixture and turn heat up to high, and cook at a rolling boil for 3-5 minutes until juices become thick and syrupy.
7. When finished, spread apple mixture onto a sheet pan and cool to room temperature.


Building the pies
1. Flour your work surface, and roll out dough to about 1/2 inch thickness.
2. Using a saucer as a guide, cut 6-8 inch circles out of the dough. You can reroll out the excess dough and get as many circles as you can, but remember pie dough gets less tender as you play with it, so go easy. I got 8 circles out of the dough above, plus a little extra that I cut out with cookie cutters to make the little top designs.
3. Spoon 2-3 Tbs of apple mixture onto half of each dough circle, leaving 1/2 inch or so around the edge to seal
4. Beat 1 egg in a separate bowl, and then brush around the edge of the dough circle.
5. Fold over the circle, making a semi-circle, and seal with the tines of the fork.
6. If you're adding cutouts to the top, just paint the back with egg, and then stick it on the top of your dough.
7. Cut 2-4 small vents in the dough for steam.
8. Brush the top of the pies with remaining egg, then sprinkle generously with reserved sugar mixture.
9. Bake at 350 until pies turn golden brown, 15-20 minutes.


WHEW! This recipe is a lot less complicated than it looks with all these steps, I promise! :)

Thursday, July 31, 2008

Hello Lovely

My mother ruined me for life by teaching me how to cook on a gas range. 4 years of college and 2 years of an apartment with wobbly electric ovens have been holding me back.

Meet my new darling. She came to live with us on Saturday and has performed every task I've asked of her so far. I took this picture on Tuesday night when I sighed with pleasure realizing I was using all four burners making tilapia and risotto. My husband took one look at it, shook his head, and said "You're spoiled!"


I must learn more photography skills. I tried without the flash and it didn't look so good. But tilapia looks awfully unappetizing in the flash glare. Perhaps I should not take my pictures once the sun has gone to bed.

And of course I had to take a picture of the beautiful blue flames, to prove she's the real deal!


Friday, July 11, 2008

Shrimp and Bacon Vodka Pasta

It's much too late for me to come up with a clever name for this. It started out with James wanting Penne a la Betsy, but I have vodka I really needed to use, so I decided to make a Vodka sauce, which I have never even tasted. So I researched and found that all good vodka sauces start with pancetta. Being lazy and cheap, I decided to use bacon and make it up as I went along.

What resulted was a slightly sweet, slightly smokey, very flavorful vodka sauce that James liked even better than Penne a la Betsy (but isn't everything better in the variation with bacon??)


Shrimp and Bacon Vodka Pasta

1/2 lb pasta (we used spaghetti. use whatever you have)
6-8 slices of bacon (we used turkey bacon) cut into 1/2 inch pieces
1 lb raw shrimp, peeled without tail
1 pinch smoked paprika
1 dash cayenne pepper
1 dash salt
1/3 cup vodka
1/2 cup half and half
1 1/2 cups prepared tomato sauce

1. Boil pasta per directions
2. Fry bacon over medium heat in a skillet until it starts to get crispy, but not completely finished.
3. In the pan with the bacon, stir in shrimp, paprika, pepper, and salt. Cook shrimp until opaque and pink. Remove shrimp (but not the bacon!) from the pan.
4. Add vodka to bacon, bring to a boil, and let it simmer until reduced by half.
5. Add half and half and tomato sauce. I used a storebought (GASP!) spaghetti sauce. If you're using the pure plain stuff, add some seasonings here.
6. Simmer for 10 minutes, stirring every few minutes.
7. Combine shrimp, pasta, and sauce, and serve!

Fruit Pizza

I've had fruit pizza several times and I've always hated it. I think the version I've always had was the sugar cookie crust with cream cheese "sauce" and then the fruit on top. Something about how dense it was always turned me off.

So I was pleasantly surprised when I arrived at a friend's house recently, tried her fruit pizza and wanted seconds and thirds! It was a little lighter, with a thin crispy crust, so good! Here's the one I made, but I didn't alter her recipe at all except for the fruit, so full credit goes to my friend Tenneal.


Fruit Pizza
Recipe from Tenneal Reus

1 refrigerated ready to use pie crust
1 tsp cinnamon sugar (3/4 tsp sugar and 1/4 tsp cinnamon)
1 1/4 cups of half and half
1 pkg Jello Vanilla Instant Pudding and Pie 4oz
1 c thawed cool whip (they make it in a spray can now! That's what I used!)
2+ cups of fresh fruit, sliced

Preheat oven to 450, unroll pie crust and sprinkle with cinnamon sugar and bake for 8 to 10 min, cool completely
Pour half and half into medium bowl and dry pudding mix, beat until well blended. Gently stir in whip cream.
Spread pudding mixture over top of pie and top with fruit, refrigerate until use
Enjoy!

Monday, May 12, 2008

Penne a la Betsy

Happy Mother's Day!


We had both families over yesterday to celebrate mother's day and I used it as an excuse to make something wonderful and fattening that I've been wanting to try.


If you haven't been to Pioneer Woman's cooking blog, you're missing out. Check it out. Then buy a case of butter at Sams, because your adventure is about to begin! For Mother's Day dinner I made her famous "Penne a la Betsy," a tomato cream sauce with shrimp and penne pasta. It was a huge hit. I might try it again at a later date with half and half or something, but most likely I'll just save it for very special occasions.


This picture is from PW's site, mine got eaten too quickly and I forgot to take pictures!

Penne a la Betsy


Full credit for the recipe and the photo go to Pioneer Woman

Since there isn't a printable recipe on PW's site for this, I copied the instructions from Dinner and Dessert. Thanks!

Ingredients:

¾ pound penne pasta

3 tablespoons butter, divided

3 tablespoons olive oil, divided

1 pound large shrimp

1 small white onion, finely chopped (I used shallot)

2 cloves garlic, minced

½ cup white wine1 (8-ounce) can plain tomato sauce

1 cup heavy cream

1 tablespoon fresh parsley, chopped

basil leaves, to taste, chiffonaded

salt & pepper to taste

Directions:

Boil water and cook pasta according to package directions.
Meanwhile, while water heats and pasta cooks, make the sauce. Melt 1 tablespoon butter and 1 tablespoon olive oil in a large skillet. Add the shrimp and cook for a few minutes, until opaque. Remove to a plate to let cool. Heat 2 tablespoons butter and 2 tablespoons olive oil in the skillet. Add the onion and garlic and cook, stirring occasionally.

While the onion and garlic are cooking, chop the shrimp into small, bite-sized pieces.

Add the wine (or chicken broth) to the pan and allow to reduce for a few minutes.

Stir in tomato sauce. Add the heavy cream and stir well to combine. Add shrimp back to the skillet and season with salt and pepper to taste.

Add the parsley and basil and mix well.
Drain pasta and return to pot. Add the sauce to the pot and stir well to combine. Serve.

Saturday, April 19, 2008

Million Dollar Peanut Butter Cookies

Pillsbury holds a bake-off every year and gives away $1 million for a great new recipe using their products. This year's recipe was from Carolyn Gurtz in MD for her Double-Delight Peanut Butter Cookies. The recipe looked so simple, I was kind of blown away that she won. Until I made the cookies.
These were so great! It's essentially a peanut butter cookie wrapped around a smooth peanut butter filling, and nothing could make my peanut-butter-lovin' husband happier. I've been on a cookie binge since I got my baking stone, and my not-so-chocolate-lovin' husband has given mediocre reviews to my last several batches of chocolate, chocolate chip, and peanut butter chocolate chip cookies. These were a HUGE hit.

The only changes I made were to omit the peanuts on the outside, and I used a break-and-bake pillsbury cookie dough with reese's pieces instead of the roll of dough.

Million Dollar Peanut Butter Cookies
INGREDIENTS
1/4 cup Granulated Sugar
1/2 teaspoon ground cinnamon
1/2 cup Creamy Peanut Butter
1/2 cup Confectioners Powdered Sugar
1 package Pillsbury® Ready To Bake® refrigerated peanut butter cookies with Reese's mini pieces, well chilled (24 cookies per package)
DIRECTIONS
1. Heat oven to 375°F. In small bowl, mix granulated sugar and cinnamon; set aside.
2. In another small bowl, stir peanut butter and powdered sugar until completely blended. Shape mixture into 24 (1-inch) balls.
3. Shape 1 cookie dough piece around 1 peanut butter ball, covering completely. Repeat with remaining dough and balls.
4. Roll each covered ball in cinnamon sugar mixture. On ungreased large cookie sheets, place balls 2 inches apart. Flatten each ball to 1/2-inch thickness with bottom of drinking glass or measuring cup.
5. Bake 7 to 12 minutes or until edges are golden brown. Cool 1 minute; remove from cookie sheets to cooling rack. Store tightly covered.

Saturday, March 22, 2008

Balcony Herb Garden

My newest adventure, or my "babies" as James has taken to calling them are my herb plants on the balcony. I find myself wanting fresh basil ALL the time, especially as we get into summer, and I got two full plants for the same price as a small semi-fresh package from the grocery store!
The lady at the nursery where I got the seedlings had only one piece of advice "FULL sun, all the time!" So I installed this window box (from walmart) over the side of the balcony. It's really my first experience growing anything, so we'll see how long I can keep them alive! I'm watering every day. I read that you can skip a day with basil, but they instantly got wilty and sad the day I tried skipping.

So far I've got basil:
Rosemary:


Cilantro:
and some thyme that I didn't a great picture of.

Tuesday, March 18, 2008

Pancetta Frittata

I tested the following recipe out last night because I want to make it for easter brunch. James's comment "That's one of the best flavored things you've made in a long time!" Sorry, pictures to come after I make it for Easter!

Pancetta Frittata
by me! :)

1 1/2 cups of egg beaters (or 6 eggs lightly beaten)
2 oz of deli counter pancetta, sliced thick, diced fairly small
2 oz of crumbled feta cheese
2 oz shredded cheddar cheese (I used the 2% milk sharp cheddar)
1-2 Tbs chopped fresh basil
Black pepper
8 inch oven/broiler safe skillet

In a dry 8 inch skillet, crisp up the pancetta over medium heat. It has plenty of its own fat so I didn't add any oil. The pancetta from the deli is really already cooked, so you're just browning it up and drawing out some of that salty ham goodness. This would be a good time to add some onion too, but then James wouldn't have eaten it.

Turn heat to medium low and pour all of the eggs over the pancetta. Sprinkle with the feta cheese and black pepper to taste. (I didn't need salt because the feta is so salty).

Turn on your broiler.

Let it cook on the stove for a minute or two, and when the bottom is starting to set, lift all the edges with a spatula so the uncooked egg floods underneath. Do that a couple of times until the egg is mostly set, but still fairly wet.

Sprinkle cheddar cheese and basil on top, move to oven 5 or 6 inches from the broil. Broil for 3 or 4 minutes until cheese starts to brown and everything sets.

The frittata should slide out easily onto a cutting board so you can cut it with a pizza cutter. For easter, I plan to do 12 eggs with a large shallow saute pan.

Nutrition facts for 1/4 of the frittata (not a huge serving, but we ate it with veggies, etc)

Nutrition Facts
4 Servings
Amount Per Serving
Calories 193.1
Total Fat 12.1 g
Saturated Fat 5.7 g
Cholesterol 27.2 mg
Sodium 595.8 mg
Potassium 321.1 mg
Total Carbohydrate 0.9 g
Dietary Fiber 0.1 g
Sugars 0.6 g
Protein 17.8 g

Friday, March 7, 2008

Confession & new recipe

My name is Carla and I have a problem. I start things and then quit them. Unfinished scrapbooks, frames without pictures, halfway reorganized closets, this is my life. But I've missed food blogging so I'm posting again, although I'm fairly sure no one except me and my husband (who I force) are reading it. Guess I need to do more advertising :)
Since I've been gone I've had lots of ups and downs cooking. I made my first prime rib, my first passable bechamel sauce, and had a whole Christmas season of cookies and baked goodies. Since mid-January I've been calorie counting like a madwoman. I have a daily allowance, and that's all I get. Because of that, I'm discovering lots of healthy new recipes, and lots of great substitutions. Mostly I'm learning about portion control. Everything's bigger in Texas--including our chicken fried steaks and, therefore, our thighs.
So for now, just one new recipe. This pumpkin bread was dense, but still very soft and sweet. Perfect for a quick breakfast! And 200 calories a slice means I'm allowed to eat one.


Chocolate Chip Pumpkin Bread


Adapted from CookingLight.com


Ingredients
1 cups sugar
1 cup canned pumpkin
1/2 cup unsweetened applesauce
2 large egg whites
1.5 cups all-purpose flour
1.5 teaspoons ground cinnamon
Dash of ground nutmeg
Dash of ground ginger
1 pinch kosher salt
1/2 tsp baking soda
1/2 cup semisweet chocolate chips
Cooking spray


Preparation
Preheat oven to 350°.
Combine first 5 ingredients in a large bowl, stirring well with a whisk. Lightly spoon flour into dry measuring cups; level with a knife. Combine flour, cinnamon, salt, and baking soda in a medium bowl, stirring well with a whisk. Add flour mixture to pumpkin mixture, stirring just until moist. Stir in chocolate chips. It helps to dust the chocolate chips in flour so they won't sink to the bottom. (I obviously didn't!)


Spoon batter into 1 (8 x 4-inch) loaf pan coated with cooking spray. (I used 9x5 loaf pans and my slices came out pretty short and fat, almost the shape of a biscotti cookie). Bake at 350° for 40-50 minutes or until a wooden pick inserted in the center comes out clean. Cool 10 minutes in pans on a wire rack, and remove from pans. Cool completely on wire rack.


Yields 1 loaf, which I cut into 10 servings. The suggested 16 from Cooking Light would have been really small.


With my changes, SparkRecipes calculated the following nutrition facts:

Nutritional Info
Servings Per Recipe: 1
Amount Per Serving
Calories: 2,040.6
Total Fat: 27.9 g
Cholesterol: 0.0 mg
Sodium: 2,464.4 mg
Total Carbs: 433.3 g
Dietary Fiber: 21.1 g
Protein: 34.0 g